
Last Updated | 29th January 2022
Having flown to Thailand at the start of 2022, I looked everywhere for information regarding what the rules were surrounding flying a drone here. The information was out there but also very scattered and outdated. Having now successfully completed the registration process in Thailand I thought I’d put together a quick little guide to help others wanting to do the same. Thailand is a beautiful place so you’ll certainly want your drone in action if you have one. The process isn’t actually that hard and all can be done online. I would recommend trying to do at least half of the process a couple of weeks before you arrive, especially if only here for a short amount of time as it can take up to 15 days to process according to the website. The only issue you may face is that in some parts of the application, a visa or photo of your passport stamp is needed. This is specifically related to the NBCT part of the process but I shall come onto this.
The Rules:
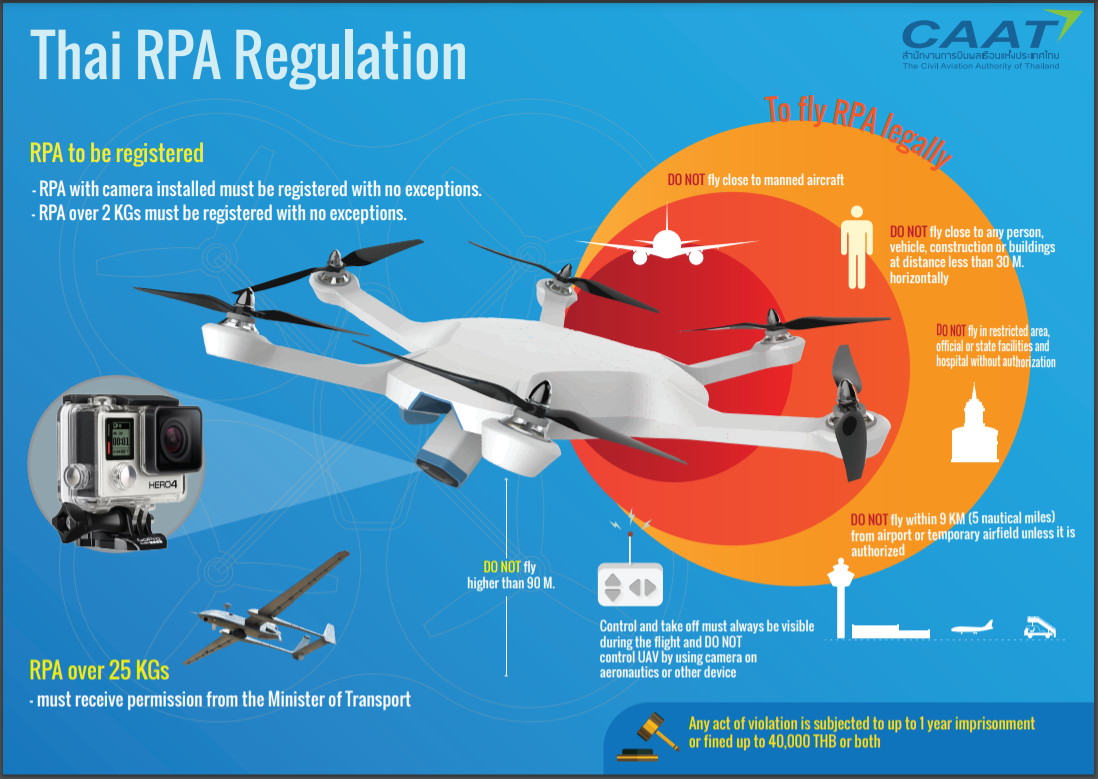
All drones with cameras, regardless of weight, must be registered in Thailand. For example, I have the 249g DJI Mavic Mini 2. But because it has a camera it must be registered. Any drone weighing over 2kg must also be registered with the authorities.
As with most Thai laws, they can be very strict on the punishment so it isn’t worth the risk of flying a drone without it being correctly registered. According to the CAAT, a violation is subject to up to 1 year in prison, a fine of up to 40,000 TBH (£1000) or both!
Who to register with
To register a drone you must do so with two separate institutions. You need both approved, not just one or the other.
CAAT – Civil Aviation Authority Thailand. Responsible for all aviation in the country. This process can 100% be done before you get to Thailand as I did so. Be aware though that during the process you need to show proof of adequate insurance cover for the drone. I brought insurance for 6 months through Coverdrone. Which cost me around £30 and has me insured for liability up to £1million.
NBTC – National Broadcasting and Telecommunications Commission. The reason these are involved is due to the frequency of the radio transmission the drone will be operating on. They also want to know the purpose of why you are using the drone. This is the part where I needed to upload a photo of my passport with a visa stamp. So you may have to wait until you get to Thailand on this one, or upload some kind of cover letter/flight itinerary?
The Process
CAAT
- First you have to create an account with the CAAT – following this link https://uav.caat.or.th/ – be sure the account matches your passport details you shall be entering the country with. You have to verify your email, then go back and log into the account to start the process. There are also some helpful videos down the bottom of the page.
- Once you have successfully logged in, up the top you can start a new application, everything is firstly in Thai, followed by an English translation. Click the relevant link, most likely to be “The Foreigner” section.

- You then just have to work your way through the application. It’s fairly easy, just fill out the details as required, for example the Drone Serial numbers are needed as well as your personal details. There is also a section where you have to upload your drone insurance documents so make sure you have these ready.
- Once you have worked your way through the process and you have submitted the form (it’s free, don’t have to pay anything). You can then log back into your account to check the status.
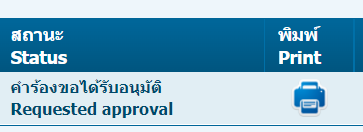
- I had expected to get an email when they approved the request (which took about 2 weeks) but one never came. I just logged back in one day and it said Requested Approval. You can then print the document or save to your phone which is valid for 2 years.
- As I said you can do all this before you enter Thailand and I recommend doing so 3 weeks before.
NBTC
I actually went to an NBTC building when I landed in Thailand, there are about 18 across the country. Once there they showed me how to complete this online, so there is no need to go to the NBTC in person anymore. However, if you feel more confident doing so, be my guest. Also, you need to upload a photo of your passport page and visa, so you can’t do this part until you enter Thailand sadly. However, using this guide you can do it as soon as you arrive and they aim to get back to you within 7 days! I also recommend completing the form with your phone as you have to upload some photos of your drone and visa etc. You can obviously have these pre-saved, or just use your phone camera when prompted to do so.
- Again you must first make an account by following the link below. Click the sign-up button in the top right to make the account. Then once you have verified your email, you can sign in and start the process https://anyregis.nbtc.go.th/accounts/login/?next=/
- Once logged in, click on Request Form, UAV Radio Equipment Registration and then Register A New Drone. The filling out of the form is pretty standard, just fill in the various sections of the form, again you will need to know your drone and controller serial numbers. You will have to upload photos of these here. As well as your passport photo page and visa stamp page. You will also have to fill in when you arrived and when you shall be leaving the country. Ensure this aligns with the stamps in the passport.
- Once you have submitted the form you then have to wait a little while for them to review the documents, they state it can take 5-7 business days but maybe longer. It took 2 business days for me.
- Once the documents have been approved you then need to pay a fee of 214 THB, (£5). You are sent an email saying you need to pay the amount. In theory, this seems pretty easy, however reality was a very different thing as is often the case with Thailand. The invoice has little QR codes to scan so I asked the lady on reception at my hotel to pay via her Thai online banking and then I would pay her. She couldn’t get it to work. I then tried at two different Thai banks, they couldn’t get it to work either. In the end, I went back to the lady on reception who rung the number on the invoice and finally managed to work her way through the process with someone on the phone. Meaning I then just paid her the 200 baht.
- After this, they will process everything and issue you with a registration approval document. This will be valid for as long as you’re allowed in the country. So if you end up staying longer you will need to renew it via the same system.
Once you have both the CAAT & NBTC approval forms I recommend either printing them or saving them both to your phone so that you can show them to any Thai authority should they request so while flying your drone. It’s probably also worth having a copy of your drone insurance on hand as well.
I hope this helps, if you have any questions drop me a comment or shoot me an email. Also if anyone thinks things have now changed do let me know 🙂

Leave a comment